A crawl space with a dirt floor can be a source of numerous problems, including excess moisture, mold growth, pest infestations, and energy inefficiency. Sealing your crawl space properly can help improve indoor air quality, enhance your home’s structural integrity, and lower energy costs. In this blog, we will walk you through the step-by-step process of how to seal a crawl space with a dirt floor effectively.
Table of Contents
ToggleWhy Should You Seal a Crawl Space with a Dirt Floor?
Before diving into the process, it’s important to understand why sealing a crawl space is beneficial. Here are some key reasons:
Moisture Control: Reduces humidity, preventing mold, mildew, and wood rot.
Energy Efficiency: Helps regulate indoor temperature, reducing heating and cooling costs.
Pest Prevention: Keeps rodents, termites, and insects from nesting in your crawl space.
Improved Indoor Air Quality: Prevents musty odors and airborne allergens from seeping into your home.
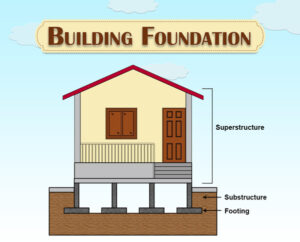
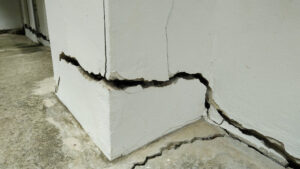
Foundation Protection: Minimizes soil erosion and structural damage caused by excessive moisture.
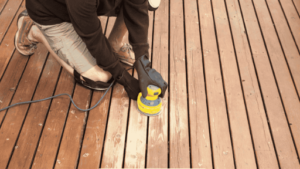
Read More Blogs: How a Pool Deck Company Can Revamp Your Outdoor Space
Step-by-Step Guide to Sealing a Crawl Space with a Dirt Floor
Step 1: Prepare the Crawl Space
Before sealing the crawl space, you must clear it of any debris and potential hazards.
1. Remove old insulation, debris, and any signs of mold or mildew.
2. Ensure there is proper drainage to prevent standing water.
3. If mold is present, treat the affected areas with a mold removal solution.
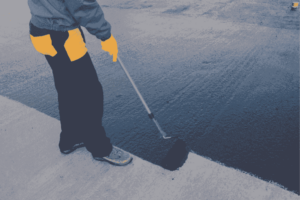
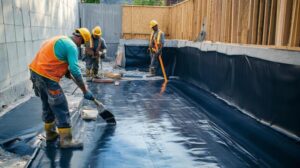
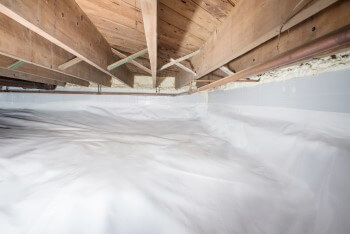
Step 2: Install a Vapor Barrier
A vapor barrier is crucial in preventing moisture from seeping into your crawl space.
1. Choose a high-quality polyethylene vapor barrier (at least 6-mil thick, preferably 12-mil or higher for better durability).
2. Roll out the vapor barrier across the entire dirt floor, ensuring full coverage.
3. Overlap seams by at least 12 inches and secure them with waterproof tape.
4. Extend the vapor barrier up the foundation walls and attach it using mechanical fasteners and sealant.
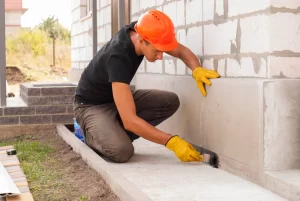
Step 3: Seal Gaps and Vent Openings
Sealing off gaps and vents prevents unwanted airflow and moisture buildup.
1. Use spray foam or caulk to seal small cracks and openings.
2. For larger gaps, consider using rigid foam board insulation.
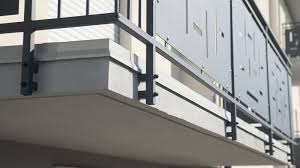
3. Close off unnecessary exterior vents to prevent humid air from entering the crawl space.
Step 4: Insulate the Crawl Space Walls
Proper insulation helps regulate temperature and reduces energy loss.
1. Best insulation options for crawl space walls:
Rigid Foam Board: Durable, moisture-resistant, and energy-efficient.
Spray Foam Insulation: Provides airtight sealing but can be expensive.
Fiberglass Batts: Not recommended for unsealed crawl spaces as they can absorb moisture.
2. Secure the insulation to the walls, ensuring there are no gaps where moisture can infiltrate.
Step 5: Install a Crawl Space Dehumidifier
To maintain an optimal humidity level, a crawl space dehumidifier is highly recommended.
1. Choose a unit with an automatic humidity control feature.
2. Place it in a central location to ensure even moisture removal.
3. Regularly check and clean the filter to maintain efficiency.
Common Mistakes to Avoid
Many homeowners make mistakes when sealing their crawl spaces. Here are some common errors and how to avoid them:
Using an Inadequate Vapor Barrier: A thin or improperly installed barrier can allow moisture to seep through.
Neglecting to Seal Seams and Edges: Overlapping and taping seams properly ensures complete protection.
Not Sealing Foundation Vents: Open vents allow humid air to enter, counteracting the sealing process.
Ignoring Drainage Issues: If standing water is present, install a sump pump or French drain before sealing the crawl space.
Maintenance Tips for a Sealed Crawl Space
Once your crawl space is sealed, routine maintenance is key to ensuring its effectiveness.
Inspect the vapor barrier periodically for tears or loose seams.
Monitor humidity levels and adjust the dehumidifier settings if necessary.
Check for pests regularly and seal any new entry points.
Look for signs of moisture and address leaks promptly to prevent future damage.
Conclusion
Sealing a crawl space with a dirt floor is a crucial step toward maintaining a healthier, more energy-efficient home. By following the steps outlined in this guide, you can prevent moisture problems, enhance indoor air quality, and protect your home’s foundation. If you’re unsure about the process or need expert assistance, consider hiring a professional crawl space encapsulation service.
At Capital Deck and Stair Waterproofing, we specialize in high-quality waterproofing solutions, ensuring your crawl space remains dry and protected for years to come. Our expert team is ready to assist you with all your waterproofing needs.
Ready to seal your crawl space and improve your home’s efficiency? Contact us today!