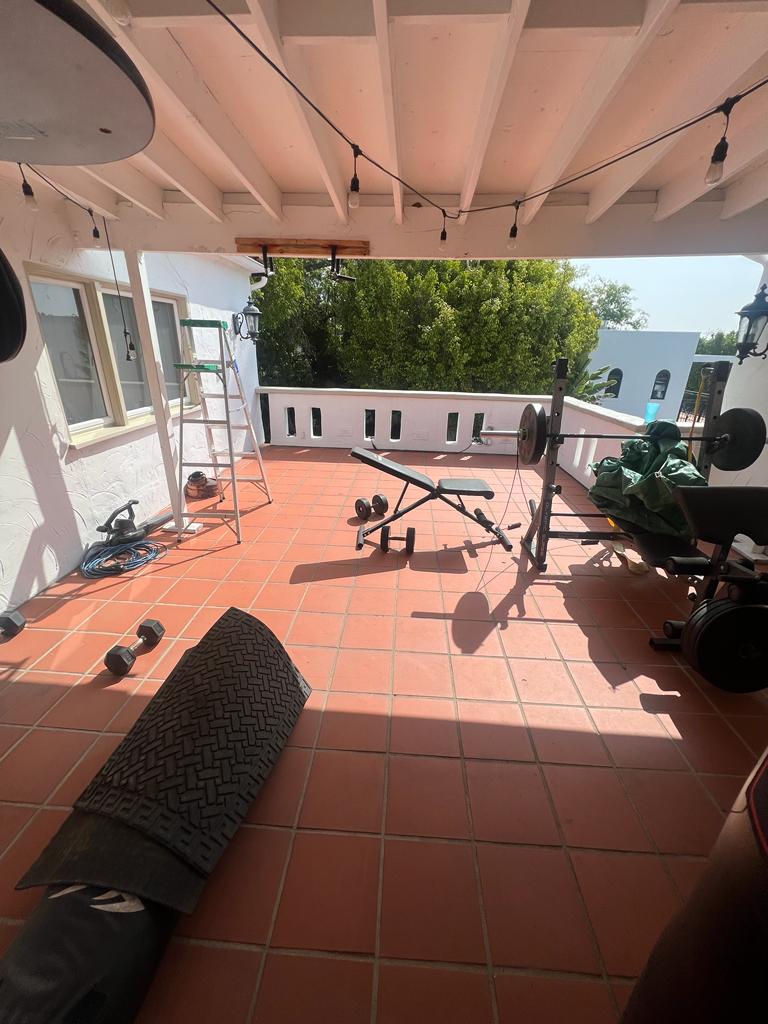
Difference Between a Patio and a Deck
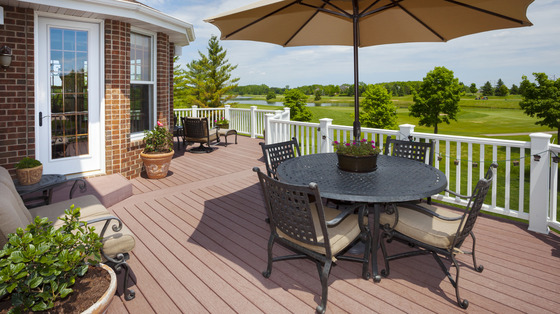
When designing an outdoor living area, homeowners often face the question of whether to install a patio or a deck. Both offer a wonderful way to extend your living space outdoors, but they come with their own set of characteristics that may suit different needs, preferences, and landscapes. Understanding the differences between a patio and a deck will help you make an informed decision on which feature is best for your home.
What is a Patio?
A patio is a flat, ground-level outdoor space that is typically constructed directly adjacent to a home or in a designated area of the backyard. Patios can be made from a wide variety of materials, including concrete, brick, stone, pavers, or even gravel. Unlike a deck, patios do not require elevated structures and can be customized in terms of size, shape, and design.
Patios are perfect for homeowners seeking a stable, durable outdoor space for dining or relaxing. For added protection, patio waterproofing ensures longevity by preventing water damage. This process safeguards the patio’s foundation, preserving its structure and appearance while allowing it to seamlessly blend with the surrounding landscape.
Patio Pros And Cons
Pros:
Outdoor Living Space: Expands living area for relaxation and entertaining.
Aesthetic Appeal: Enhances the beauty of your backyard.
Durability: Lasts for years with minimal maintenance.
Increased Home Value: Adds value to your property.
Customizable: Can be tailored to various styles and sizes.
Cons:
Cost: Initial installation can be expensive.
Weather Exposure: Can suffer from weather wear and tear.
Maintenance: Requires cleaning and occasional repairs.
Pests: May attract insects if not maintained properly.
What is a Deck?
A deck is a raised outdoor structure, typically built from wood, composite materials, or vinyl, that is attached to a home or built as a freestanding structure. Decks are elevated above ground level and often have railings for safety, especially if the deck is several feet above the ground. Decks can be built at different heights and can be as simple or as elaborate as you choose, making them versatile in terms of design.
The primary function of a deck is to provide an elevated outdoor living space, particularly beneficial for homeowners with sloped or uneven terrain. Decks offer a fantastic way to enjoy scenic views, entertain guests, or create an outdoor oasis with a distinct, raised feel. They are commonly used for dining, lounging, and hosting events, offering an excellent platform for relaxation. To ensure longevity and protect the structure, commercial deck waterproofing is essential. This process involves applying protective coatings that prevent water damage, which can lead to wood rot, mold, and deterioration, thereby maintaining the deck’s beauty and durability over time.
Deck Pros And Cons
Pros:
Outdoor Living: Ideal for entertaining or relaxing outdoors.
Increased Home Value: Adds value to your property.
Versatile Design: Can be customized in various shapes, sizes, and materials.
Easy to Maintain: Requires less upkeep than a lawn or garden.
Durable: Long-lasting with proper care, especially with composite materials.
Cons:
Cost: Initial installation can be pricey.
Weather Exposure: Can be affected by sun, rain, or snow.
Maintenance: Wood decks require regular sealing and staining.
Pests: May attract insects like termites or ants.
What Is the Difference Between a Patio and a Deck?
While patios and decks both serve as functional outdoor spaces, the key differences between the two are in their design, construction, and location.
Location and Elevation: The most obvious difference is that patios are generally located at ground level, while decks are elevated. Patios are typically installed on flat or level ground directly adjacent to the home, whereas decks are built above ground and often require stairs for access.
Materials: Patios are made from solid materials such as concrete, stone, or brick. They are typically more durable and can withstand weather conditions over time without much maintenance. Decks, on the other hand, are constructed from wood, composite materials, or vinyl. While wood decks provide a natural aesthetic, they require more upkeep, while composite decks are low-maintenance and resistant to wear.
Cost: Patios tend to be less expensive than decks, primarily due to the fewer materials and simpler construction methods involved. Decks require more labor-intensive work, especially if built at elevated heights, which can increase their overall cost.
Maintenance: Patios are generally easier to maintain because the materials used are more durable and require less upkeep. Concrete and stone patios, for instance, typically need only periodic cleaning or resealing. Decks, especially those made of wood, require more regular care, such as cleaning, sanding, and staining.
Design Flexibility: Patios offer greater design flexibility since they can be made from a wide variety of materials, from natural stone to gravel. This allows homeowners to create a more personalized outdoor space. Decks, while customizable in terms of layout and materials, often have a more uniform appearance and are limited to specific design elements like railings and deck furniture.
Functionality: Patios are better suited for families or individuals looking for a casual, flat space to relax, eat, or entertain outdoors. Decks, being elevated, can offer better views and are perfect for properties that require an outdoor space above ground level or for hosting larger gatherings.
Read More: What Sets Patio Waterproofing Solutions Apart from Other Deck Systems?
Features of Patio Vs. Deck
| Feature | Patio | Deck |
|---|---|---|
| Definition | Ground-level structure, typically made of concrete, pavers, or stone. | Elevated structure, usually built with wood or composite materials. |
| Cost | Generally more affordable to install. | Higher initial cost due to materials and construction. |
| Maintenance | Low maintenance; resistant to weather damage. | Requires regular staining or sealing to prevent damage. |
| Durability | Long-lasting and weather-resistant. | Can be prone to rot or warping without upkeep. |
| Aesthetic Appeal | Blends well with landscaping. | Offers stunning views and elevation. |
Patio vs Deck: Factors to Consider Before Deciding Between a Deck or a Patio
The decision between a patio and a deck ultimately depends on your priorities, such as budget, design preferences, and how you intend to use the space. Here are some Factors to Consider Before Deciding Between a Deck or a Patio:
Budget: If you are working with a tight budget, a patio is likely the more cost-effective option. Patios typically require fewer materials and less labor to construct. If you have the budget for a more elaborate structure, a deck offers more possibilities in terms of design and features.
Terrain: If your property is flat, a patio is often the better option, as it requires less grading and is easier to install. On the other hand, if you have a sloped backyard, a deck may be the more practical solution since it can be elevated to create a flat, level surface.
Usage: Both patios and decks are ideal for outdoor living, but the type of space you want to create should guide your decision. If you envision a space for outdoor cooking, relaxing, and hosting guests, a deck may provide a better experience, especially if you want to take advantage of elevated views. If you’re looking for a more grounded, low-maintenance option, a patio is a great choice.
Maintenance: For minimal upkeep, patios are generally the better option. A stone or concrete patio requires very little maintenance and can last for decades. Decks, especially those made from wood, need regular cleaning, staining, and sealing to prevent deterioration.
Aesthetic: The visual appeal of your outdoor space is another important factor to consider. Patios offer more design flexibility, while decks have a more structured look. If you’re aiming for a natural, rustic aesthetic, a wood deck may be the better choice. If you’re going for a sleek, modern design, a stone or tile patio might suit your needs better.
Conclusion
Choosing between a patio and a deck depends on your needs, lifestyle, and budget. Patios are affordable, low-maintenance, and adaptable to various landscapes, while decks offer elevated views and are ideal for sloped terrains. To ensure durability and protection, consider consulting waterproofing companies in Los Angeles for services that prevent water damage and enhance the longevity of your outdoor space. This ensures your patio or deck remains in excellent condition, no matter the weather.
Best Way to Build a Deck: Step by Step Instructions

Building a deck is one of the best ways to enhance your outdoor living space, increase your home’s value, and create a place to relax or entertain guests. While hiring professionals is always an option, many DIY enthusiasts take on the challenge of building a deck themselves. If you’re up for it, this step-by-step blog will show you the best way to build a deck, from planning to finishing touches. And to make things even easier, we’ve included a video tutorial to walk you through the process visually.
Must Read: How to Build a Four Season Room on a Deck
Step by Step Instructions for the Best Way to Build a Deck
Step 1: Planning and Design
Before you pick up a hammer, the most important step is proper planning. Choose the best location for your deck by considering factors like sunlight, access to your house, and the size of your outdoor area. Design the deck according to your needs—whether it’s a small space for grilling or a large area for hosting friends.
You’ll also need to:
- Check local building codes and get permits if necessary.
- Choose your materials: pressure-treated wood, composite, or hardwood.
- Gather all the necessary tools, including a circular saw, drill, tape measure, and level.
Step 2: Preparing the Foundation
Once you’ve planned your deck, it’s time to prepare the foundation. Start by marking the area where the deck will go. Measure accurately to ensure that your deck will be level and square.
Here’s how to prepare the foundation:
- Dig post holes at least 2 feet deep and set them in concrete footings for support.
- Allow the concrete to cure for at least 24 hours to ensure stability.
- Install posts in the footings, ensuring they are plumb and level.
- A solid foundation is crucial to the overall strength and longevity of your deck.
Step 3: Installing the Deck Frame
Now it’s time to start building the frame that will support the deck. The frame is composed of the ledger board, beams, and joists.
- Attach the ledger board to your house using lag bolts or screws, ensuring it is level.
- Once the ledger is secure, install the beams and joists perpendicular to the ledger. Space the joists evenly (typically 16 inches apart).
- Add rim boards to complete the frame and secure everything tightly.
The frame provides the structure for your deck, so make sure everything is square and level before moving forward.
Step 4: Laying the Deck Boards
With the frame in place, it’s time to install the deck boards. The best way to lay deck boards is to start at one end and work your way across the frame, securing each board with screws or nails.
Tips for laying deck boards:
- Space the boards slightly to allow for expansion and airflow.
- Use a chalk line to ensure the boards are straight.
- Secure the boards with screws or nails, but don’t overtighten to prevent splitting.
This step is where your deck really starts to take shape, so take your time to ensure everything looks even and aligned.
Step 5: Adding Railings and Stairs
Deck railings are essential for safety, especially if your deck is elevated. You can choose from a variety of railing styles, such as wood, metal, or glass.
Steps to install railings and stairs:
- Install posts at the corners of your deck and along the sides where railings are required.
- Attach the railing boards and balusters, ensuring they are evenly spaced and secure.
- If your deck requires stairs, install stringers and attach the steps.
Make sure all railings and stairs meet local building codes for safety.
Step 6: Finishing Touches
Your deck is almost complete, but finishing touches will ensure it looks great and lasts for years.
- Sand the surface of the deck to smooth out rough edges.
- Apply a protective sealant or stain to protect the wood from the elements.
- Consider adding furniture, lighting, or plants to enhance the space.
Finishing the deck properly will improve both its appearance and durability.
Step 7: Video Tutorial
For those who prefer visual learning, check out our comprehensive video tutorial that walks you through each of these steps. The video shows everything from framing to installing railings, giving you a detailed view of the process.
Conclusion
Building a deck may seem daunting, but with careful planning and attention to detail, it can be a rewarding DIY project. By following these step-by-step instructions, you’ll be able to create a beautiful outdoor space that adds value to your home. Don’t forget to watch the video for extra guidance or you can call a professional deck builder for expert touch to your deck.
How to Restore an Old Deck So It Looks Like New

As the years roll by, our decks endure a lot – rain, snow, and the scorching sun take their toll. The wood can bend, rot, or just lose its original charm, leaving us with a deck that’s not exactly a joy to behold or to walk on.
But fear not! Restoring your deck can turn into a fun weekend project, especially if you’re a fan of doing things yourself. The plan is simple: check how your deck is holding up, fix any issues with the structure, tighten up loose bits, get rid of old paint or stain, give it a good scrub, smooth it out with some sanding, and finally, finish it off with a wood brightener before adding a fresh coat of paint or stain. This seals the wood, keeping it safe from the sun’s rays and pesky moisture. Follow this guide to give your old deck a new lease on life.

What to Consider Before Restoring an Old Deck
Before diving into a deck repair and restoration endeavor, it’s crucial to gauge the overall condition of the deck. Sometimes, the damage might be too extensive to salvage, necessitating a complete teardown and reconstruction with fresh components. Look out for signs of severe rot or areas with significant damage that may surpass basic repair methods.
Furthermore, taking precise measurements of the deck is essential before acquiring any deck stripper, stain, or paint for the job. This guarantees that you have ample supplies to see the project through to completion.
When to Restore an Old Deck
When it comes to tackling outdoor projects, it’s usually best to wait for the warmer months. But if you’re thinking about reviving a tired deck, doing it smack in the middle of summer might not be the best idea. The scorching heat can make the whole process pretty uncomfortable, and it might mess up how your stain or paint looks if it dries up unevenly due to the heat.
A smarter move would be to schedule your deck restoration gig for spring or fall. The cooler temperatures in the morning and evening make the job much more bearable. Plus, you might snag some deals on deck materials since it’s the offseason.
Read More: Deck Restoration Vs. Replacement: Which Option Is Best For You?
How to Restore a Deck
Restoring a deck can breathe new life into your outdoor space, providing a welcoming retreat for relaxation and gatherings. By following a few simple steps, you can transform a old and worn deck into a rejuvenated focal point of your home. Let’s dive into how to restore your deck to its former glory.
Steps for Restoring a Deck
Inspect the Deck: Before diving into restoration, carefully examine your deck for any signs of wear and tear. Check the supports, fasteners, and boards for rot, warping, or shifting.
Supplement Existing Deck Supports: If needed, reinforce sagging supports with concrete or additional beams to ensure stability and longevity.
Secure or Renew Screws, Brackets, and Fasteners: Secure loose hardware and replace any damaged pieces to maintain structural integrity.
Replace Rotted or Damaged Boards: Remove and replace severely damaged boards or beams to prevent further deterioration.
Rectify Small Cracks using Polyurethane Caulk: Address minor cracks with flexible caulk to prevent water damage and prolong the lifespan of the deck.
Prepare the Area: Protect surrounding surfaces with tape and plastic sheeting to minimize damage during the restoration process.
Remove Prior Paint or Stain Decks: Remove old paint or stain using appropriate stripping products to prepare the surface for a fresh finish.
Sanitize the Deck: Pressure wash the deck to remove dirt and debris, revealing the natural beauty of the wood.
Smooth the Deck: Smooth the surface with sandpaper to remove imperfections and prepare for sealing.
Protect the Deck: Apply wood brightener to enhance the wood’s appearance, then seal with paint or stain to protect against UV rays and moisture, ensuring a long-lasting finish.

Old Deck Restoration Tips
Building, repairing, or restoring an old deck can be a time-consuming task, especially for those tackling it alone or with limited experience. If you’re unsure about the condition of your deck or how to proceed, seeking professional advice is a wise move. They can assess whether restoration is feasible or if a rebuild is necessary.
Regular inspections are key to catching minor issues before they escalate. Schedule cleanings, sandings, and sealings every few years to protect your deck from the elements.
Remember to prioritize safety by wearing proper protective gear like glasses, masks, gloves, and sturdy footwear. For expert deck waterproofing services, consider reaching out to Capital Deck & Stair Waterproofing today!
DIY Deck Repair: How to Fix Minor Issues and Save Money
Decks are a terrific way to add value to your house and provide a year-round gathering place for friends and family. However, even the strongest and most well-built decks have upkeep requirements that can accumulate over time if regular maintenance is not performed. Deck repair is probable if your decking is a couple of years old. The most basic deck repairs may be done by yourself.
DIY Deck Repair is an excellent method to save money while giving your deck a facelift without hiring a professional. You can quickly repair and enhance your deck with the correct equipment and supplies. With the right information and tools, you can care for your deck and endure it for many years. Fixing a deck may save you time and money, especially if the area is small. Decking repair, whether aesthetic or structural, may be a do-it-yourself effort. It is also a faster and less expensive choice than phoning a professional.
Check More Blogs: The Importance of Regular Deck Maintenance: Tips for Keeping Your Deck Safe and Beautiful
How to fix
Identifying the Problem
After a hard day, a backyard deck is a terrific place to rest and decompress. You may be thinking of adding a deck to your landscaping to make it more appealing for dining outside or enjoying a drink with a friend, but you may be concerned about some of the deck problems. While you know, you want a suitable place; you surely don’t want an outside area that will cause you headaches, inconveniences, and stress. You want to enjoy your patio since it is an investment.
The first step in resolving any patio issue is determining what maintenance and upkeep is necessary. Patios are often composed of concrete or stone, and they must be sealed regularly to keep the elements at bay. It is also critical to examine the patio regularly for symptoms of damage or degradation, such as cracked concrete or loose stones. The patio must be cleaned periodically to avoid dirt and debris buildup.
Apart from routine maintenance and care, being aware of any possible concerns is also critical. For example, if the patio is subjected to excessive sun or rain, it may discolor or sustain water damage. Therefore, it is essential to learn how to handle any patio-related difficulties. Typically, it is preferable to begin by identifying the problem and then taking the necessary actions to resolve it. This might include filling any cracks or adding a sealer to keep the patio from deteriorating further.
Gather the Necessary Supplies
The first step in DIY deck repair is to acquire the necessary supplies. Whether repairing a few damaged boards or making more significant repairs, having the correct supplies is critical. Understanding what you’ll need before you begin can help you save time and money. Pressure-treated wood is frequently the best choice for deck materials. It’s tough, long-lasting, and resistant to decay and insects. If you need to replace broken boards, ensure they are the same size and thickness as the originals. Deck screws, nails, and other hardware are also required.
Additional supplies, such as joist hangers, post anchors, and deck flashing, may be required for more significant restorations. You’ll also need a drill, a saw, a screwdriver, a hammer, a level, and a measuring tape. If your deck is built of composite material, you may need to purchase a saw blade explicitly developed for cutting composite boards. You’ll also need to ensure you have the necessary cleaning and staining products. A power washer, deck cleaner, sealer, and stain are among them. Use products that are made for the sort of wood your deck is built of.
You can ensure the success of your DIY deck repair job by gathering all of the required items before you begin. Conducting your homework and selecting suitable materials and equipment for the project is critical. You can repair your deck and make it seem new again with the correct supplies and some know-how.
Repairing Cracks and Splits
A cracked or split deck may be an eyesore and a safety threat. However, you can repair a cracked or split deck with simple DIY procedures.
To begin, clean the area surrounding the crack or split. Remove any dirt, debris, or mildew accumulated with a power washer and a scrub brush. Scrape away any loose or flaking paint or wood with a putty knife.
Once the area is clean and dry, use wood filler to fix the crack or split. Smooth the wood filler with a putty knife and allow it to dry thoroughly.
After that, smooth the area where the wood filler was applied using a sander. This will assist the filler in blending in with the surrounding wood, giving the restoration a more natural appearance.
Lastly, apply a coat of deck stain to the area with a paintbrush. This will assist in preserving the wood while also making the restoration appear more smooth.
Replacing Damaged Boards
If you have a DIY deck repair job that requires replacing broken boards, you must know how to do it correctly. Changing boards may be complex, and it’s critical to do it right, so the deck remains structurally strong. To begin, analyze the damage to identify which boards must be replaced. Consider any bent boards, fractures, splinters, and any components that may have deteriorated over time.
After determining what you require, it’s time to select the appropriate boards. Because pressure-treated wood is more durable, it’s an excellent choice for the project. Be careful to measure the present boards and purchase replacements of the same size and type of wood. Before replacing the broken boards, clear the area and clean up any debris. Next, using a saw, cut the panels to the appropriate size and form. Finally, attach the new planks with a hammer and nails.
Check the boards for any evidence of more damage. If the panels are bent or fractured, you may need to sand them down or paint over them to finish the work. Replacing the broken boards in your DIY deck repair is a snap with a few easy steps. Then, you’ll have a deck that appears like new and the pleasure of a job well done.
Finishing Touches
DIY deck repair is an excellent method to increase the value and pleasure of your house. The final phase in the process is the finishing touches that will make your deck seem brand new. These measures will guarantee that your deck is both valuable and attractive. The first step is to use a power washer or pressure washer to clean the deck. This will clear away any dirt and debris, allowing you to examine any required repairs. After cleaning the deck, look for loose boards, nails, screws, or other possible hazards. Before proceeding, make any needed repairs.
When the repairs are finished, it’s time to put the finishing touches on. This involves sanding rough edges, using a wood filler to fix cracks or gaps, and staining or painting the whole deck. Use high-quality outdoor paint to protect the wood if you wish to paint. Next, add ornamental components like outdoor lights or furniture when the paint has dried. The final step is to apply a deck sealant. This will prevent the wood from fading and water damage. It also provides the deck with a glossy appearance and makes cleaning simpler. With a bit of work, you can have a fantastic DIY deck repair that looks brand new.
Conclusion
DIY deck repair is an excellent method to save money while extending your deck’s life. With a few essential tools and a few hours of labor, you can drastically improve the appearance and feel of your outdoor area. Not only will you save money on installation, but you will also be able to tailor the project to your preferences. Replace damaged boards, patch gaps, paint, and seal, and add aesthetic details like railings and seats to your DIY deck repair. With a few pointers and some study, you can do deck repairs that will endure for years. And the money you save can be used to make further changes to your outside space or to start a new project. DIY deck repair is a cost-effective way to maintain and improve the appearance of your deck.
If you’re looking for professional assistance with deck repairs, consider contacting Capital Deck & Stair Waterproofing. They are a reputable business specializing in deck and stair waterproofing services. While DIY repairs can be rewarding, sometimes it’s beneficial to seek the expertise of professionals to ensure the longevity and durability of your deck. Capital Deck & Stair Waterproofing can provide you with the necessary expertise and guidance to tackle any deck repair project effectively. Their services can help you save time and ensure that your deck is well-maintained and protected against water damage.
RECENT POSTS
categories
- Uncategorized
- Waterproofing
- Stair Tread Replacement
- FAQ
- Balconies
- Precast Iron Stairs
- Outdoor Stairs
- Leisure Deck
- Deck Resurfacing
- Pool Decks
- Deck Maintenance
- Deck Staining
- Deck Materials
- Nonslip Deck Coatings
- Fiberglass Stairs
- Gardening
- Deck Repair
- Patio Waterpoofing
- Commercial waterproofing
- Concrete Waterproofing
- Planters Waterproofing