How to Build a Privacy Wall on an Existing Deck
Creating a private sanctuary on your existing deck can significantly enhance your outdoor living experience. A well-built privacy wall not only offers a secluded space but also adds a personal touch to your deck, allowing you to enjoy your outdoor area with greater comfort and peace. Whether you’re looking to block out neighbors or shield yourself from the elements, constructing a privacy wall can be a rewarding DIY project. This guide will walk you through the steps for building a privacy wall on an existing deck, offer creative deck privacy ideas, highlight common mistakes to avoid, and provide maintenance tips to ensure your privacy wall remains in top condition.
Read More: 5 Reasons to Add Privacy to Your Deck and How To Do It?
Steps for How to Build a Privacy Wall on an Existing Deck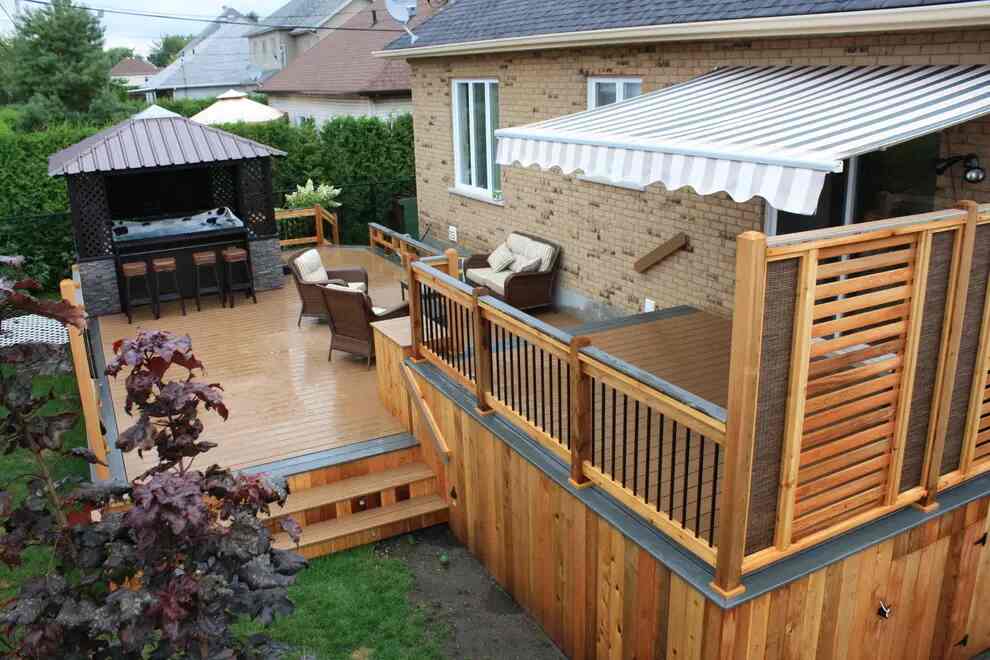
-
Plan Your Privacy Wall
- Determine Your Needs: Consider the primary reason for your privacy wall—whether it’s to block views, reduce wind, or add a decorative element.
- Measure the Space: Measure the area where you plan to install the wall. Consider height, length, and the deck’s structural support. Ensure you follow any local building codes or homeowner association guidelines.
- Choose Your Design: Decide on the style and materials of the privacy wall. Options include lattice panels, solid wood, or even a combination of materials.
-
Gather Materials and Tools
- Materials: Common materials include wood (cedar, pine, or composite), lattice panels, posts, screws, and concrete for post footings. You may also need paint or stain for finishing.
- Tools: Essential tools include a tape measure, saw, drill, level, hammer, and a post-hole digger.
-
Prepare the Deck
- Inspect the Deck: Ensure your deck is in good condition and can support the additional weight of the privacy wall.
- Clear the Area: Remove any furniture or items from the deck area where you’ll be working. This provides a clear workspace and helps prevent damage to your belongings.
-
Install the Posts
- Mark Post Locations: Based on your measurements, mark where the posts will go. Use a level to ensure they are evenly spaced and aligned.
- Dig Post Holes: Use a post-hole digger to create holes for the posts. The depth should be at least one-third of the post height for stability.
- Set Posts: Place the posts in the holes, ensuring they are level and plumb. Fill the holes with concrete or gravel to secure the posts in place. Allow the concrete to cure according to the manufacturer’s instructions.
-
Attach Horizontal Supports
- Measure and Cut Supports: Cut horizontal supports (often referred to as “rails”) to fit between the posts. These will provide stability and a framework for the privacy wall.
- Secure the Rails: Attach the horizontal supports to the posts using screws or nails. Ensure they are level and properly aligned.
-
Install the Privacy Panels
- Measure and Cut Panels: Depending on your chosen design, measure and cut the privacy panels to fit between the horizontal supports. Panels can be pre-made or custom-built.
- Attach Panels: Secure the panels to the horizontal supports using screws or nails. Ensure they are evenly spaced and properly aligned.
-
Finish the Privacy Wall
- Paint or Stain: Apply paint or stain to protect the privacy wall from the elements and to match your deck’s aesthetics. Ensure you follow the manufacturer’s recommendations for application and drying times.
- Add Decorative Elements: Consider adding additional features like planters, climbing vines, or lighting to enhance the look of your privacy wall.
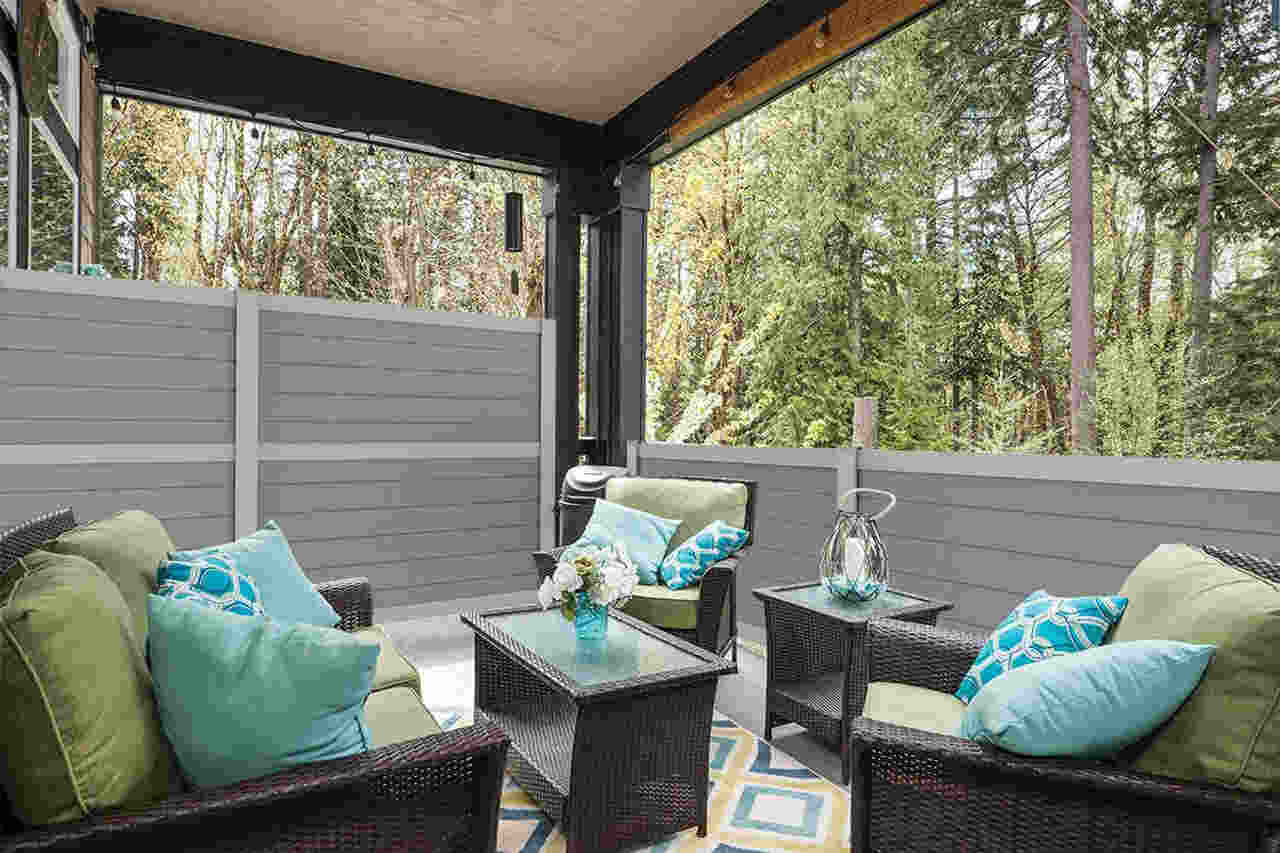
Deck Privacy Ideas
For top deck ideas, trust Capital Deck’s expertise. Their designs blend functionality and style, turning your deck into a perfect retreat.
- Lattice Panels: Lattice panels offer a classic look and can be used alone or combined with climbing plants for added privacy and greenery.
- Vertical Slats: Installing vertical slats can create a modern, sleek appearance. The spacing between the slats can be adjusted based on the desired level of privacy.
- Trellis: A trellis can provide a partial barrier while allowing light and air to pass through. It can be adorned with climbing plants for added beauty.
- Privacy Screens: Prefabricated privacy screens are available in various materials and designs, offering an easy and stylish solution for deck privacy.
- Outdoor Curtains: For a more flexible option, consider installing outdoor curtains. They can be drawn open or closed depending on your needs and can add a soft, elegant touch to your deck.
- Green Walls: Incorporating a green wall with a variety of plants can create a lush, natural barrier that enhances privacy while adding a touch of nature to your deck.
Common Mistakes to Avoid While Building a Privacy Wall
- Ignoring Local Building Codes: Failing to adhere to local building codes and regulations can result in fines or having to dismantle the wall. Always check with your local authorities before starting construction.
- Improper Post Installation: Posts that are not properly set or aligned can cause instability and result in a wobbly or unsafe privacy wall. Ensure posts are securely anchored and level.
- Skipping the Planning Stage: Rushing into construction without a clear plan can lead to errors in measurement, design, and execution. Take the time to plan and measure carefully.
- Choosing the Wrong Materials: Using materials that are not suitable for outdoor conditions can lead to premature wear and tear. Opt for weather-resistant materials to ensure durability.
- Neglecting Deck Support: Adding a privacy wall can put additional stress on your deck. Ensure that your deck’s structure can support the added weight and that all connections are secure.
- Overlooking Maintenance: A privacy wall that is not maintained can deteriorate quickly. Regularly check for signs of damage, and perform necessary repairs and upkeep.
How to Maintain Your Deck Privacy Wall
- Regular Inspections: Periodically inspect your privacy wall for signs of damage, such as cracks, warping, or loose panels. Address any issues promptly to prevent further damage.
- Cleaning: Clean the privacy wall regularly to remove dirt, debris, and mildew. Use a mild detergent and water, and avoid harsh chemicals that could damage the materials.
- Repainting or Restaining: Reapply paint or stain as needed to protect the wood or other materials from the elements. This helps to maintain the wall’s appearance and longevity.
- Check for Pest Infestations: Inspect for signs of pests like termites or carpenter ants, which can damage wooden components. Treat any infestations immediately to prevent further damage.
- Reinforce Structural Integrity: Ensure that all screws, nails, and other fasteners remain secure. Tighten or replace any loose or damaged hardware as needed.
- Protect from Extreme Weather: Consider adding protective coverings or treatments to shield the privacy wall from harsh weather conditions, such as heavy rain, snow, or intense sun.
Conclusion
Enhancing your existing deck with a privacy wall adds both seclusion and style, turning your outdoor area into a serene retreat. By carefully planning, choosing durable materials, and following proper construction techniques, you create a lasting and attractive barrier. Avoid common mistakes and ensure regular maintenance to keep your privacy wall functional and beautiful. For added protection, consider deck waterproofing in Los Angeles to safeguard your deck from weather-related damage. With these steps, your deck can become a true extension of your home, offering a private oasis for relaxation and enjoyment for years to come.
RECENT POSTS
categories
- Uncategorized
- Waterproofing
- Stair Tread Replacement
- FAQ
- Balconies
- Precast Iron Stairs
- Outdoor Stairs
- Leisure Deck
- Deck Resurfacing
- Pool Decks
- Deck Maintenance
- Deck Staining
- Deck Materials
- Nonslip Deck Coatings
- Fiberglass Stairs
- Gardening
- Deck Repair
- Patio Waterpoofing
- Commercial waterproofing
- Concrete Waterproofing